
Align HP Printer with the Help of Certified Experts
If the printer ink fails to line up properly on printouts,or your printer shows an “alignment failed” error message, it might be your printer is out of alignment. You can align your Hewlett-Packard printer by aligning your ink cartridges, resetting your printer, or else using a different type of paper.If you don’t know how to Align Your HP Printer, then read out the blog post from top-to-toe constantly. You will get effectual ideas and can do this task without any hurdle. Moreover, you may also contact HP Printer Service team for getting desired possible solution of this problem.
Methods to Align Your HP Printer
Go through the below-given instructions carefully as only then you will be able to align your printer and take printouts clear in no time.Have a glance at once:
Method 1: Align Ink Cartridges
· Power-on your HP printer
· Load a A-4 size of plain paper into the printer’s input tray
· Launch the HP Solution Center application on your computer by clicking on “Start”button followed by “Programs” and “HP”
· Tap on “Settings,” then select “Print Settings” within the HP Solution Center
· Click on “Printer Toolbox”
· Click on “Align the Print Cartridges”
· Click on “Align,” and then follow the on-screen instructions to adjust your printer and properly align the cartridges
Method 2: Reset the Printer
If the above method is not beneficial for you, then jump to the next method that is resetting your printer. Do it with the help of given steps:
· Turn-on your HP printer
· Now,disconnect the power cord from the back with keeping the printer powered on
· Unplug the printer’s power cord from the electrical outlet
· Wait for a minute and then plug the power cord back into the electrical outlet
· Reconnect the power cord to the back of your printer
· Wait for a moment until your printer gets automatically power-on by itself
· After that print a page to verify that your printer is now properly aligned
Method 3: Making Use of Correct Type of Paper
If the above method is not worked out for you, then use this method:
· First of all remove all paper from your printer’s input tray
· Make sure the paper you are loading into the input tray is clean, unused and A4 size
· Remove any photo, color, or used paper if applicable, and insert the plain white paper to the printer’s input tray
· Touch the right arrow and select “Setup” from your printer’s control panel home screen
· Select“Tools”
· Touch the down arrow and select “Align Printer”
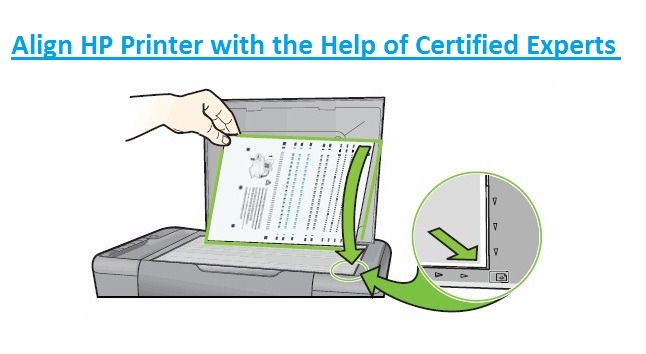
· Open the top lid of your printer, and place the alignment test page
· Locate the piece of paper front right corner of the scanner glass
· Close the lid and press “OK.” Your printer will scan the alignment page
· Verify the alignment page that it displays a series of marks that are black and blue in color
· Examine the colored marks to verify that neither of the colors look faded,inconsistent, or streaky
· Print a test page to assure that your printer is now properly aligned and no longer displays the “alignment failed” error message
Contact Experts If the Problem Continue
Don’t you get satisfied with these given procedures? Want some more handy solution for aligning your HP printer? If yes, then contact HP Support Printer as we have educated and expert tech-geeks who will assist you at reasonable cost. So, don’t worry! Your printer will easily be aligned within a pinch.
View Source: https://printerrepair.photo.blog/2019/07/02/align-hp-printer-with-the-help-of-experts/